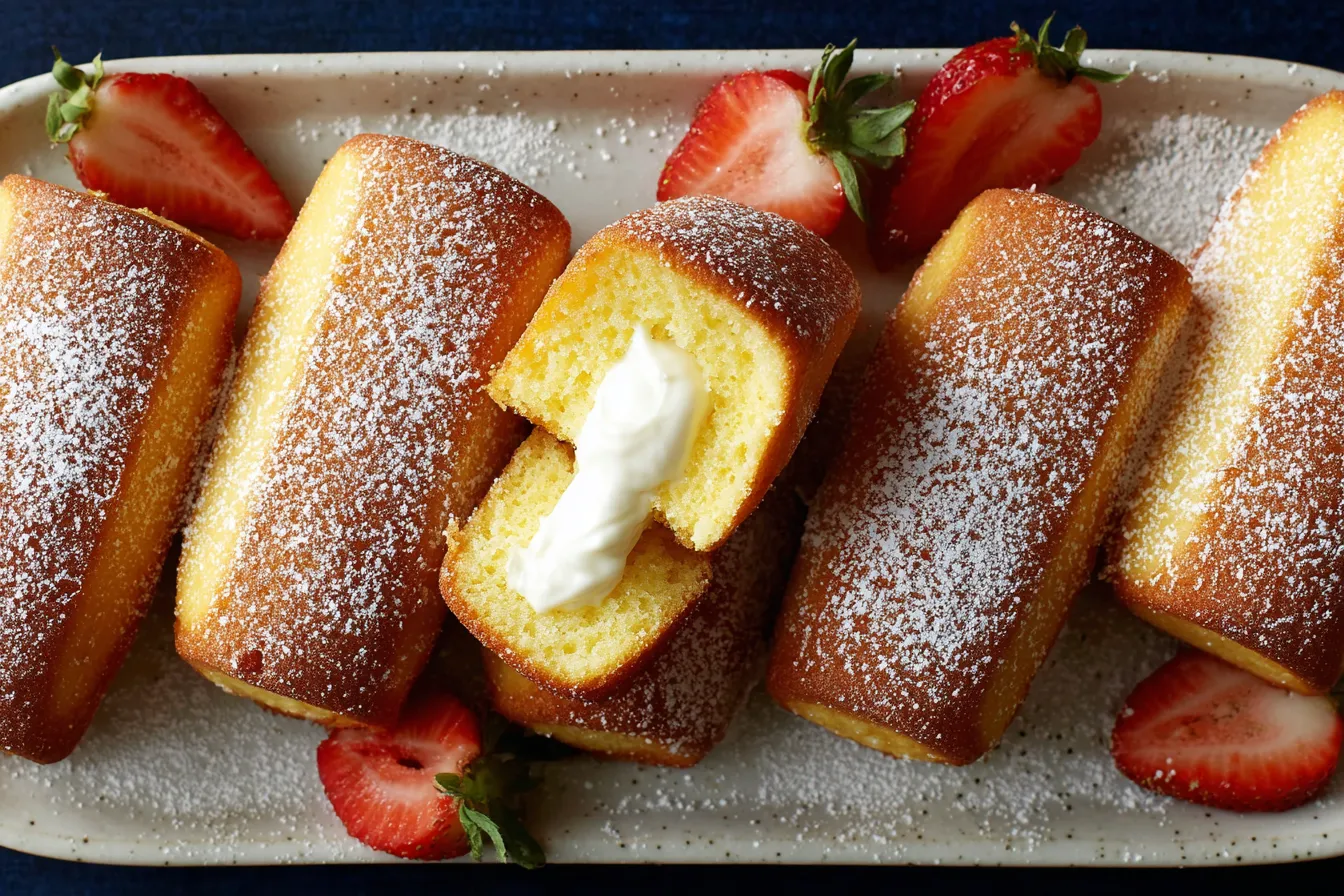
If there’s one snack that instantly takes many of us back to childhood lunchboxes and after-school treats, it’s Homemade Twinkies. Soft, golden, and filled with fluffy cream, they’re pure comfort food in handheld form. And let me tell you—making them at home is not only easier than you think, it’s also incredibly rewarding. 💛
These Homemade Twinkies are a lifesaver when you want a fun baking project, a crowd-pleasing dessert, or just a little sweet joy at the end of a long day. They’re made with real ingredients, no mystery preservatives, and all the cozy vibes of a classic treat—only better.
As a busy home cook myself, I love recipes that feel special without turning the kitchen into a disaster zone. This one checks all the boxes: simple, nostalgic, and guaranteed to make people smile.
Table of Contents
Why You’ll Love These Homemade Twinkies
Let’s be honest—store-bought snacks have their place. But these Homemade Twinkies? They’re on a whole different level.
- Soft, tender sponge cake that melts in your mouth
- Creamy marshmallow filling made from scratch
- No artificial flavors or preservatives
- Perfect for parties, bake sales, or “just because” baking
They taste like the Twinkies you remember… only fresher, lighter, and made with love. And honestly, your kitchen will smell like a vanilla-scented hug while they bake.
Ingredients You’ll Need
For the Cakes
- 1 cup all-purpose flour
- ½ teaspoon baking powder
- ¼ teaspoon salt
- 4 large eggs, room temperature
- ⅔ cup granulated sugar
- ½ teaspoon vanilla extract
- 2 tablespoons milk
- 1 tablespoon unsalted butter, melted
For the Filling
- ½ cup unsalted butter, softened
- ½ cup marshmallow creme
- 1 cup powdered sugar
- 1 teaspoon vanilla extract
- 1 tablespoon heavy cream
Nothing fancy. Just simple pantry staples doing what they do best.
Step-by-Step: How to Make Homemade Twinkies
Don’t worry—this process is very doable, even on a busy afternoon.
1. Prep the Oven and Pan
Preheat your oven to 350°F (175°C). Grease a Twinkie pan or mini loaf pan and set it aside. No Twinkie pan? Mini loaf pans work just fine.
2. Mix the Dry Ingredients
In a small bowl, sift together the flour, baking powder, and salt. This helps keep the sponge light and airy.
3. Whip the Eggs and Sugar
In a large bowl, beat the eggs and sugar with an electric mixer for 6–8 minutes, until thick, pale, and fluffy. This step is key—it’s what gives the cake its signature texture.
4. Fold Gently
Add the vanilla extract, then gently fold in the flour mixture in batches. Take your time here. Think “soft and careful,” not “power mixing.”
5. Add Milk and Butter
Stir together the warm milk and melted butter, then gently fold it into the batter until just combined.
6. Bake
Fill each mold about ¾ full. Bake for 12–15 minutes, until golden and a toothpick comes out clean.
Let the cakes cool completely before removing them from the pan.

Making the Creamy Marshmallow Filling
This filling is the heart of Homemade Twinkies—and it’s dreamy.
- Beat the butter until light and fluffy.
- Add marshmallow creme, powdered sugar, vanilla, and cream.
- Beat until smooth, creamy, and irresistible.
Try not to eat it straight from the bowl. (No judgment if you do.)
Filling the Twinkies Like a Pro
Using a piping bag with a small round tip, poke three small holes in the bottom of each cake. Pipe the filling inside until you feel the cake slightly puff up.
That’s it! Suddenly, you have real-deal Homemade Twinkies sitting on your counter like you’re running a tiny bakery.
Helpful Tips for Perfect Results
- Room-temperature eggs matter. They whip better and give you more volume.
- Be gentle when folding. Overmixing = dense cake.
- Cool completely before filling. Warm cakes and cream filling are not friends.
- If your filling seems thick, add a tiny splash of cream. Extra comfort never hurt anyone.
A Little Personal Note from My Kitchen
The first time I made these Homemade Twinkies was during one of those weeks where everything felt like too much—work, errands, and a never-ending to-do list. Baking these felt like hitting pause.
When my family took that first bite, the smiles said it all. That’s the magic of simple, homemade desserts—they slow us down and bring us together, even if just for a few sweet minutes.
FAQs About Homemade Twinkies
Can I make these without a Twinkie pan?
Absolutely. Mini loaf pans or even foil molds work great.
How should I store Homemade Twinkies?
Keep them in an airtight container in the refrigerator for up to 4–5 days.
Can I customize the filling?
Yes! Add citrus zest, a drop of almond extract, or even mini chocolate chips for a fun twist.
Are Homemade Twinkies kid-friendly?
Very much so. They’re a hit with kids and parents alike—and a fun baking project to do together.
A Sweet Ending Worth Savoring
There’s something extra special about making Homemade Twinkies from scratch. They’re nostalgic, comforting, and just plain fun to bake. Whether you’re sharing them at a party, packing them into lunchboxes, or enjoying one quietly with a cup of coffee, they bring joy in the simplest way.
If you’ve been craving a dessert that feels familiar but tastes even better, these Homemade Twinkies are calling your name. 💛 Bake a batch—you deserve a little sweetness today.
Keep the Cozy Cooking Momentum Going
If you’re anything like me, once you’ve got something sweet like Homemade Twinkies cooling on the counter, you start dreaming up what to make next—or even how others put their own spin on a classic. Whether you’re planning meals for the week or just collecting cozy inspiration, these ideas will keep the good food vibes rolling:
- Italian Grinder Chicken Salad that’s perfect for parties and lunches
- Slow Cooker Garlic Butter Beef Bites and Potatoes for an easy comfort-food dinner
- Chocolate Cinnamon Rolls for a gooey weekend baking treat
- Crème Brûlée Cookies for a fancy-but-easy dessert moment
- A classic homemade Twinkies recipe for extra nostalgic inspiration
Homemade Twinkies
- Total Time: 35 minutes
- Yield: 10 cakes 1x
Description
Homemade Twinkies are a nostalgic dessert made better with real ingredients. Soft golden sponge cakes are filled with fluffy marshmallow cream for a classic treat that’s fresher, richer, and made from scratch.
Ingredients
For the Cakes
1 cup all-purpose flour
1/2 teaspoon baking powder
1/4 teaspoon salt
4 large eggs, room temperature
2/3 cup granulated sugar
1/2 teaspoon vanilla extract
2 tablespoons milk
1 tablespoon unsalted butter, melted
For the Filling
1/2 cup unsalted butter, softened
1/2 cup marshmallow creme
1 cup powdered sugar
1 teaspoon vanilla extract
1 tablespoon heavy cream
Instructions
Preheat oven to 350°F (175°C). Grease a Twinkie pan or mini loaf pan.
In a small bowl, whisk together flour, baking powder, and salt.
In a large bowl, beat eggs and sugar for 6–8 minutes until thick and pale.
Add vanilla, then gently fold in dry ingredients in batches.
Stir milk and melted butter together, then gently fold into batter.
Fill molds 3/4 full and bake 12–15 minutes, until golden and set.
Cool completely before removing from pan.
Beat filling ingredients until light and smooth.
Pipe filling into cooled cakes through small holes in the bottom.
Notes
Be gentle when folding to keep the cakes light and fluffy.
Allow cakes to cool fully before filling to prevent melting the cream.
Store refrigerated in an airtight container for up to 4 days.
- Prep Time: 20 minutes
- Cook Time: 15 minutes
- Category: Dessert
- Method: Baking
- Cuisine: American
Nutrition
- Serving Size: 1 cake
- Calories: 270
- Sugar: 22 g
- Sodium: 120 mg
- Fat: 14 g
- Saturated Fat: 8 g
- Unsaturated Fat: 5 g
- Trans Fat: 0 g
- Carbohydrates: 32 g
- Fiber: 1 g
- Protein: 4 g
- Cholesterol: 95 mg