When the holiday rush hits full speed and your to-do list looks like it’s multiplying by itself, a No Bake Christmas Cookie Lush might just be the little miracle you need. This dessert is creamy, colorful, cozy, and—most importantly—doesn’t require you to turn on the oven. Yes, really. You can save your oven for the ham… or more cookies. I won’t judge.
If you’re looking for something festive that feels special without eating up your entire evening, this recipe is the perfect match. It’s the kind of dessert that lets you walk into your holiday gathering looking like you’ve got everything under control—even if your wrapping paper is still in the bag and you’re hiding Amazon boxes in the closet.
As the chef behind SlowCookersRecipes.com, I’m all about recipes that pack big flavor without adding extra stress, especially during the holidays. This No Bake Christmas Cookie Lush checks every box: it’s quick, it’s creamy, it’s layered like a dream, and it sparkles with holiday sprinkles. Your house will smell like peppermint cheer, and your family will think you secretly hired a pastry chef.
Table of Contents
Why You’ll Love This No Bake Christmas Cookie Lush
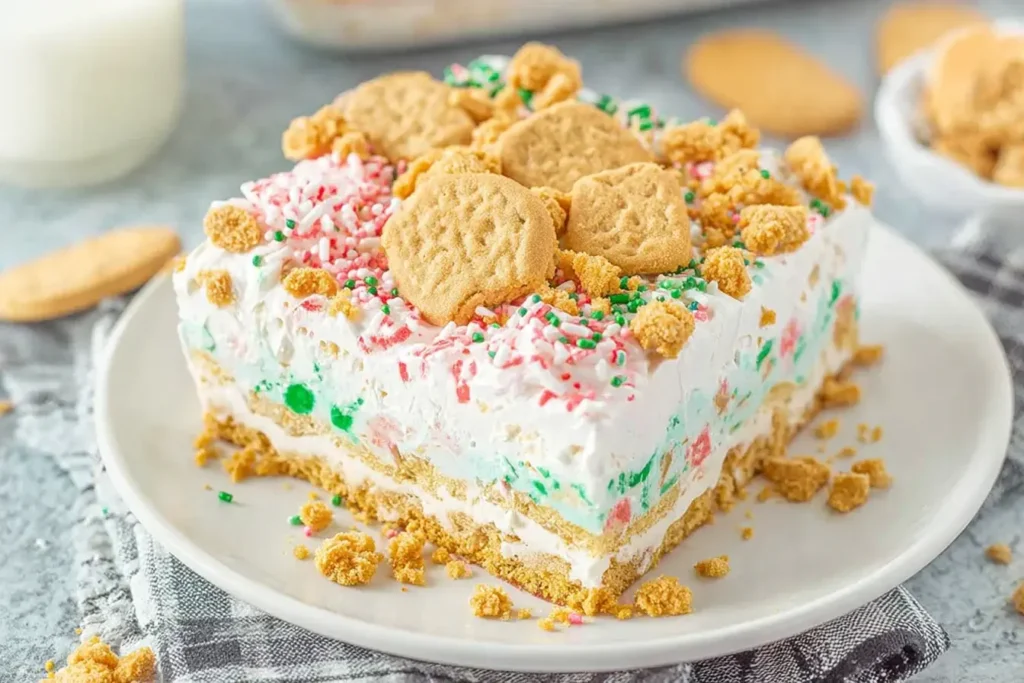
This dessert is basically the holiday season in a 9×13 pan. It’s whimsical, rich, kid-friendly, and ideal for busy moms, tired professionals, or anyone who loves a layered dessert but refuses to preheat the oven.
Here’s why it belongs on your holiday table:
- No baking needed. Your oven can rest—just like you deserve to.
- Layers of creamy goodness. Cheesecake filling + pudding + whipped topping = holiday magic.
- Holiday sprinkles for instant cheer. Because everything feels better with sparkles.
- Easy to make ahead. Perfect if you want dessert done before the chaos begins.
- Guaranteed crowd-pleaser. Don’t be surprised if guests ask for the recipe before they even finish their slice.
Ingredients You’ll Need
To make this festive No Bake Christmas Cookie Lush, gather the following:
- 48 vanilla cookies, divided
- 6 tablespoons butter, melted
- 1 package cream cheese (8 ounces, softened)
- 1 cup powdered sugar
- 2 tablespoons holiday sprinkles, divided
- 2 tubs whipped topping (8 ounces each)
- 1 box cheesecake instant pudding mix (3.4 ounces)
- 2 cups cold milk
- ½ teaspoon peppermint extract (listed in the instructions but omitted from your ingredient list—adding here for accuracy)
How to Make This No Bake Christmas Cookie Lush
This recipe comes together in layers—like a cozy dessert lasagna. Each layer is simple, colorful, and packed with holiday sweetness. And since the secondary keywords match the primary keyword, they’ll pop up naturally as we go.
Step 1: Prep Your Dish
Start by lining a 9×13 baking dish with parchment paper. This step is optional but makes slicing and lifting the No Bake Christmas Cookie Lush a whole lot easier. I’ve learned this the hard way—scraping dessert out of the pan is not the Christmas memory you want to have.
Step 2: Make the Cookie Crust
Crush 36 vanilla Oreo cookies into fine crumbs. Use a food processor if you have one, or go old-school with a zip-top bag and rolling pin if you need to work out some holiday stress.
Mix the crumbs with the melted butter and ½ tablespoon of sprinkles. Press the mixture firmly into the baking dish to form an even, festive crust. This will be the foundation of your lush, so make sure it’s packed in tight.
Step 3: Make the Cream Cheese Layer
In a bowl, beat the softened cream cheese, peppermint extract, and powdered sugar until smooth and creamy.
Fold in one tub of whipped topping along with ½ tablespoon of sprinkles.
Spread this peppermint-kissed layer over your cookie crust. It’s soft, creamy, and tastes like the holiday season without being overpowering.
Step 4: Create the Pudding Layer
Whisk the cheesecake instant pudding mix with 2 cups of cold milk until thickened. Stir in ½ tablespoon of sprinkles for some extra Christmas sparkle.
Spread the pudding mixture over the cream cheese layer. This layer adds that classic lush texture we all adore.
Step 5: Add the Final Fluffy Layer
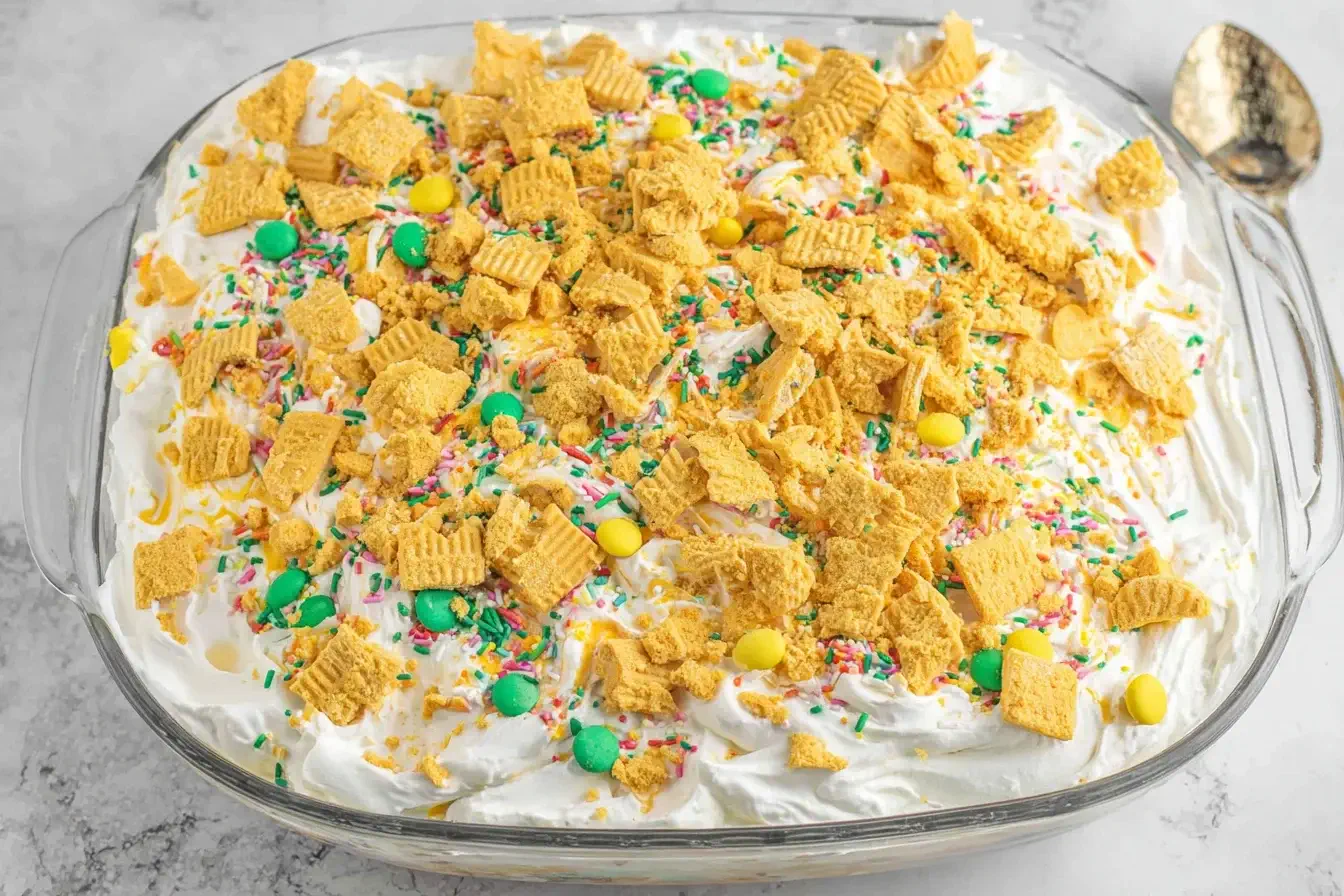
Spread the remaining tub of whipped topping across the top. It’s like a fluffy snow blanket—smooth it out or create cute little swirls.
Step 6: Add the Cookie Sprinkle Topping
Crush the remaining 12 cookies and sprinkle them across the top. Finish with the remaining sprinkles. At this point, your No Bake Christmas Cookie Lush should look festive enough to star in a holiday movie.
Step 7: Chill and Serve
Refrigerate for at least 4 hours, or freeze if you want firmer slices. During this time, the layers settle beautifully, and the flavors get cozy with each other.
Slice, serve, and watch the smiles appear.
Tips to Make Your No Bake Christmas Cookie Lush Even Better
After making this for more holiday gatherings than I can count, here are a few tips to help you create the perfect lush:
- Crust too soft? Add 1–2 extra crushed cookies or an extra tablespoon of butter. You’re aiming for that sweet spot between firm and buttery.
- Pudding too thick? Whisk in a tablespoon of milk at a time until it reaches a silky consistency—not too runny, not too stiff.
- Don’t skip chilling. I know it’s tempting, but letting it rest helps every layer set.
(Also, slicing too early may result in a dessert avalanche. Festive? Yes. Practical? No.) - Make it your own. Swap sprinkles for crushed candy canes or use chocolate pudding instead of cheesecake pudding for a deeper, richer flavor.
- Want clean slices? Run your knife under hot water, wipe, and repeat between cuts. Your dessert will look bakery-level sharp.
A Little Holiday Story From My Kitchen
This No Bake Christmas Cookie Lush became one of my go-to holiday desserts during one of the busiest Decembers of my life. Picture this: a mountain of unwrapped gifts, kids asking for 20 different snacks, and me standing in the kitchen with exactly zero desire to bake anything.
But I still wanted something festive. Something fun. Something that didn’t scream, “I gave up on dessert.”
This recipe rescued me. It came together quickly, tasted amazing, and made me feel like I had my life (mostly) figured out. And every year since, it’s become a tradition—one I’m so excited to share with you.
FAQs About No Bake Christmas Cookie Lush
Can I make this No Bake Christmas Cookie Lush ahead of time?
Absolutely! In fact, it’s even better the next day because the layers have time to set beautifully.
Can I substitute the vanilla Oreo cookies?
Yes—golden sandwich cookies, shortbread cookies, or even gingersnaps work well if you’re feeling adventurous.
Do I have to use peppermint extract?
Nope! If peppermint isn’t your thing, skip it. The lush will still be sweet, creamy, and delicious.
Can I make this gluten-free?
Use gluten-free vanilla cookies for the crust and check your pudding mix labels. It’s an easy swap.
Bring It Home
Whether you’re hosting, attending, or just trying to get one dessert on the table without losing your holiday cheer, this No Bake Christmas Cookie Lush is your new secret weapon. It’s festive, simple, and guaranteed to bring joy to your holiday table—even if your decorations are still in a box somewhere.
Make it once, and it’ll earn a permanent spot in your holiday rotation. Cozy, creamy, colorful… this dessert tastes like Christmas wrapped in a hug.
If you’d like to add more no-bake desserts to your collection or want some hands-off holiday slow cooker magic, I’ve got plenty more waiting for you in my kitchen.
Happy holidays—and enjoy every delicious bite!
More Festive Recipes You’ll Love
If you enjoyed this No Bake Christmas Cookie Lush, here are a few more holiday favorites your family and friends will absolutely adore:
- Keep the sweet fun going with this deliciously creamy Christmas Cookie Dip — it’s perfect for parties, movie nights, or dipping anything you can get your hands on.
- Add a little magic to your dessert table with Reindeer Food, a playful and irresistible treat kids and adults love.
- For something crunchy, sweet, and totally addictive, try the classic Christmas Crack — it disappears fast, so maybe make two batches.
- And if you want a festive drink that everyone can enjoy, this bubbly and refreshing Non-Alcoholic Christmas Punch is always a crowd-pleaser.
These cozy holiday recipes pair beautifully with your Christmas Cookie Lush and bring even more cheer to your celebrations. Enjoy!
Print
No Bake Christmas Cookie Lush
- Total Time: 20 minutes (plus chilling time)
- Yield: 12 servings 1x
Description
This No Bake Christmas Cookie Lush is a festive, creamy, and colorful holiday dessert made with layers of whipped topping, cheesecake pudding, crushed cookies, and plenty of sprinkles. Perfect for busy holiday baking days—no oven needed!
Ingredients
48 vanilla cookies, divided
6 tablespoons butter, melted
1 package cream cheese (8 ounces), softened
1 cup powdered sugar
2 tablespoons holiday sprinkles, divided
2 tubs whipped topping (8 ounces each)
1 box cheesecake instant pudding mix (3.4 ounces)
2 cups cold milk
½ teaspoon peppermint extract
Instructions
Line a 9×13 baking dish with parchment paper (optional).
Crush 36 cookies into fine crumbs using a food processor or a zip-top bag and rolling pin.
Mix crumbs with melted butter and ½ tablespoon sprinkles. Press into the dish to form a crust.
Beat cream cheese, peppermint extract, and powdered sugar until smooth. Fold in one tub of whipped topping and ½ tablespoon sprinkles.
Spread the cream cheese mixture over the crust.
Whisk pudding mix with cold milk until thickened. Stir in ½ tablespoon sprinkles.
Spread the pudding mixture over the cream cheese layer.
Top with remaining whipped topping.
Crush the remaining 12 cookies and sprinkle over the top. Add remaining sprinkles.
Chill for at least 4 hours (or freeze for firmer slices). Slice and serve.
Notes
For a firmer crust, add 1–2 extra cookies or 1 extra tablespoon of melted butter.
For cleaner slices, dip your knife in hot water and wipe between cuts.
Swap peppermint extract for vanilla if you prefer a milder flavor.
This dessert tastes even better the next day after fully chilling.
- Prep Time: 20 minutes
- Cook Time: 0 minutes
- Category: Dessert
- Method: No Bake
- Cuisine: American
Nutrition
- Serving Size: 1 slice
- Calories: 360 kcal
- Sugar: 28 g
- Sodium: 260 mg
- Fat: 18 g
- Saturated Fat: 9 g
- Unsaturated Fat: 7 g
- Trans Fat: 0 g
- Carbohydrates: 44 g
- Fiber: 1 g
- Protein: 3 g
- Cholesterol: 22 mg